A range of possibilities
Deciding whether to use veneer rather than solid wood is a complex choice. The three main reasons that shops take this path are aesthetics, structure and cost. Aesthetics means that…
Deciding whether to use veneer rather than solid wood is a complex choice. The three main reasons that shops take this path are aesthetics, structure and cost.
Aesthetics means that veneer allows a designer to use a wider palette — both physically wider in that veneer can be laid up as wide as the substrate and visually wider in that veneer comes in more species, cuts and even colors than solid hardwoods.
Structure means that veneer can be applied to a stable substrate such as MDF, which eliminates or dramatically reduces many concerns about moisture that include expansion, contraction, warping and twisting among others.
And cost can be a big factor, too. It is often less expensive to purchase a veneered product and attach it to a substrate in-house (or to buy it already laminated onto a substrate) than it is to purchase the same volume of solid hardwood. Think of the time saved by not having to dress, flatten and straighten solid boards or deal with waste factors imposed by Mother Nature such as loose knots, tension wood, checking or even discoloration that is invisible until a board is planed.
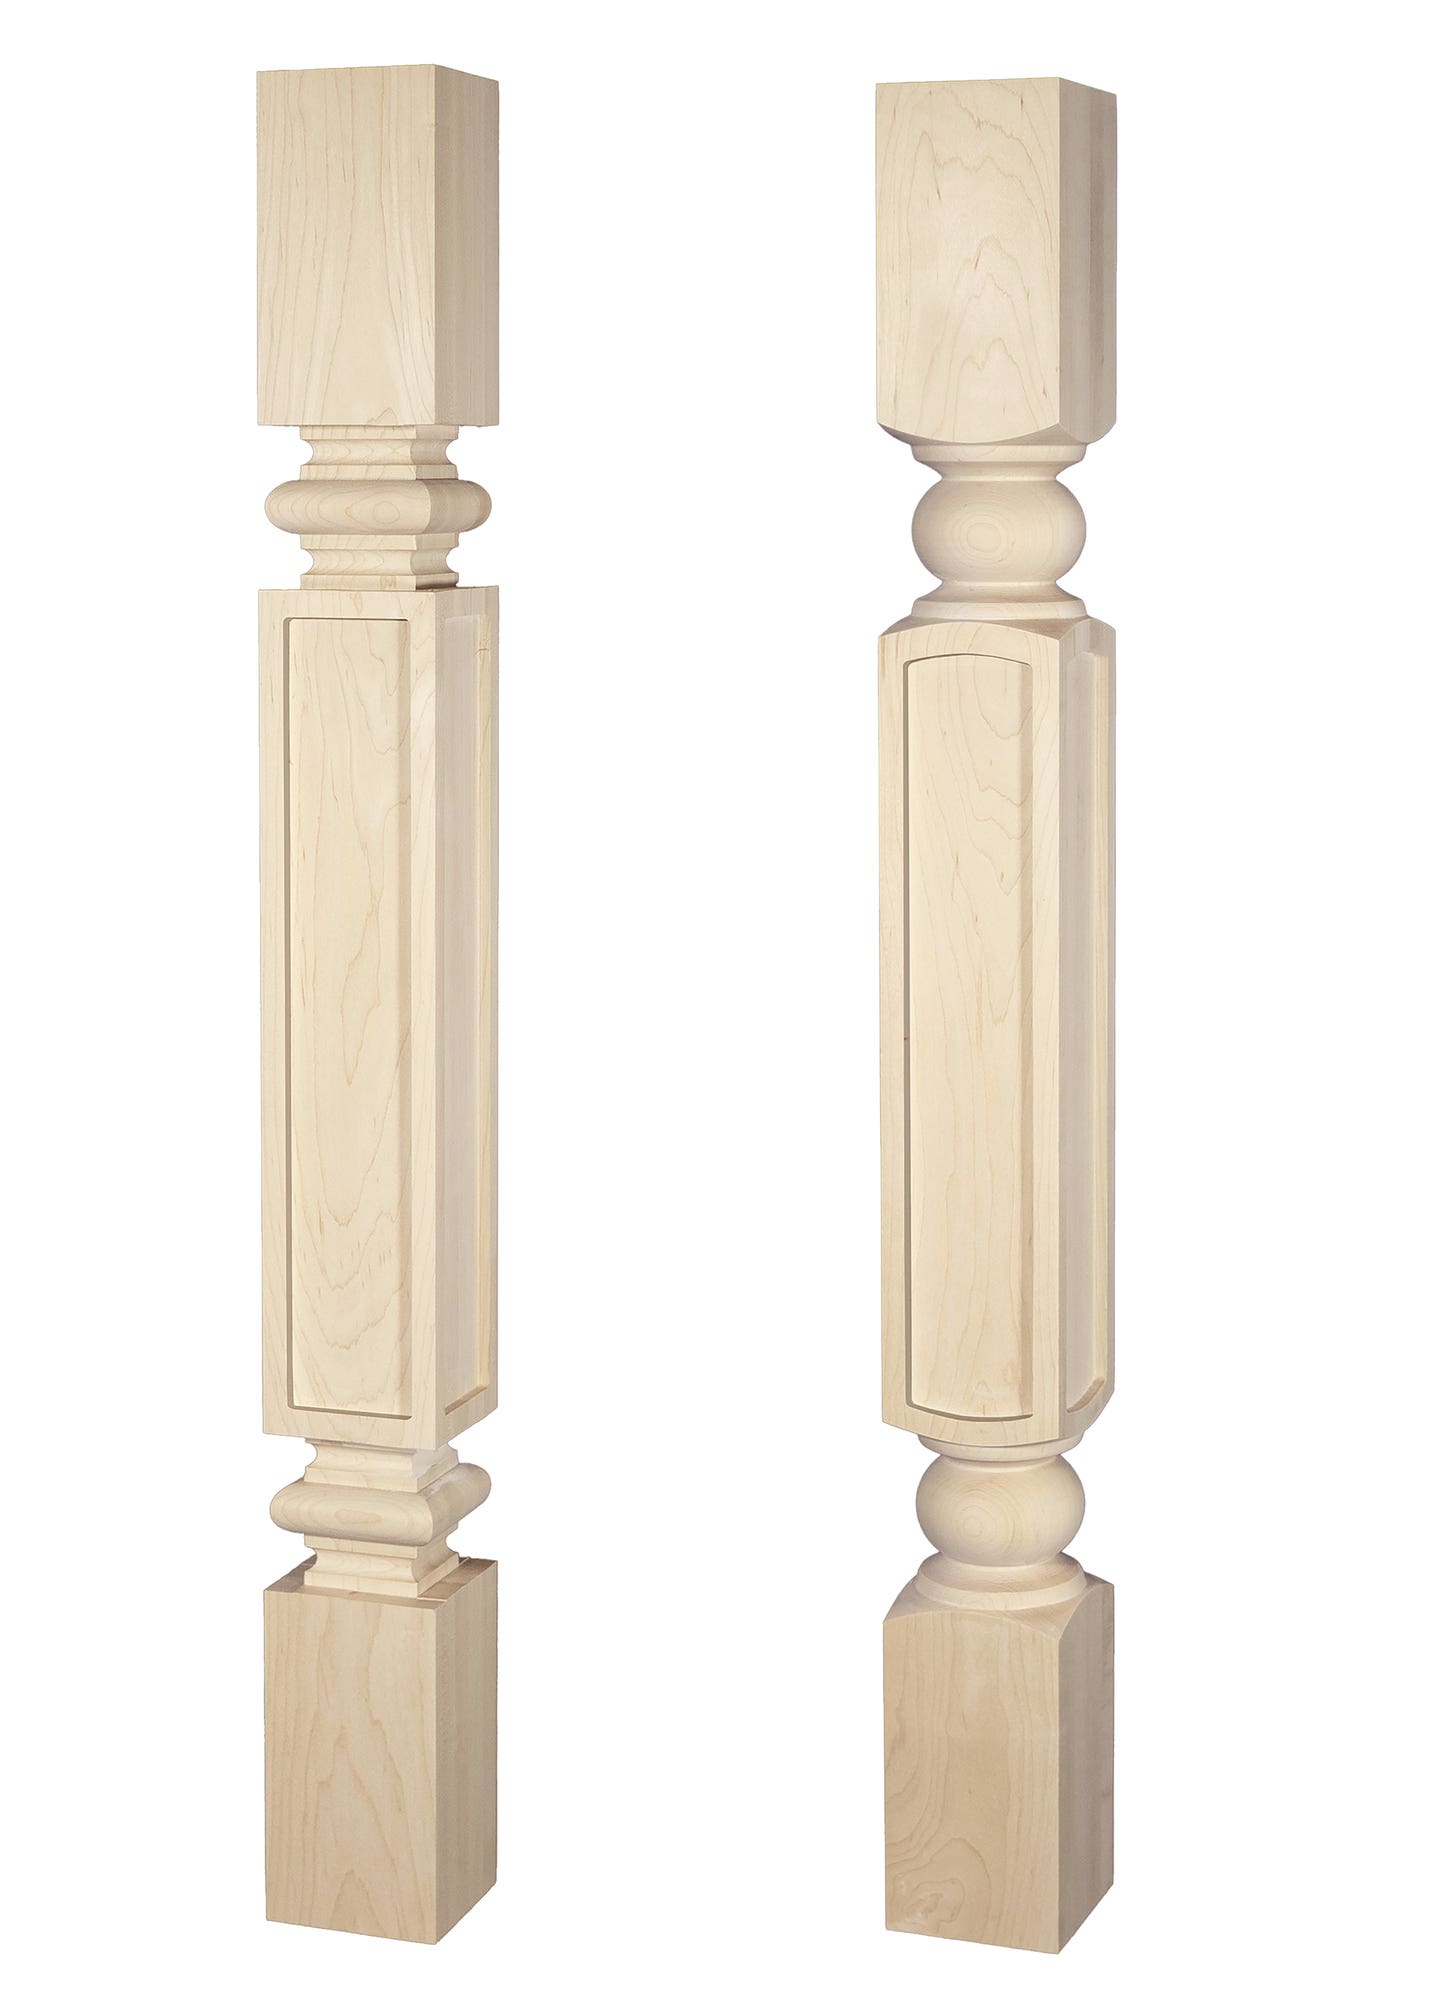
Veneer isn’t only used on flat panels in casework. It can also be bent, curved and formed to make furniture parts and, used wisely, it can deliver premium grain from all vantage points. For example, a solid wood quartersawn leg will have two quartersawn facets and two plain sawn. But with veneer, all four faces can be quartersawn and equally attractive.
Once the choice has been made to work with veneer, the first step is to become acquainted with the various buying options. These include the way veneer is cut and also the way it is matched.
Veneer cuts
There are four areas of a tree where veneer can be harvested. These are the straight trunk (sometimes referred to as the bole), which yields the largest area, and figured wood from crotches, burls and bases. Trunks have both heartwood and sapwood and this can be an issue. Wood from the base or root system of a tree is collectively called stump wood.
Anyone who has ever used a hand plane knows how differently these different growth areas respond to tools, so the veneer industry has developed ways to cut and slice each of these challenging grain patterns.
By far the most common and least expensive veneer cut is a simple rotary method. This cut is used on the trunk, which is the area between the tapered stump and the dendritic crown. (Dendrite growth includes crotches, limbs, branches, twigs and leaves.) Commercial veneer logs tend to have long, straight and parallel trunks because the mills that turn out rotary cut veneer are high volume outfits that can’t afford to waste time on unique setup. They like their logs uniform and not too tapered. A rotary veneer cut is made with a long, extremely sharp knife while the log is rotated on a lathe. Usually, veneer is about 1/40” to 1/32” thick and the mill allows for that plus sanding to determine how thick a slice to take during each rotation of the log. Initially, the blade slices in a hit-and-miss fashion until the log is trued up and, after that debris is removed, the machine delivers a continuous and long sheet of wood. Most machines are programmed to crosscut the veneer at specific intervals, so that the mill ends up with a pile of veneer sheets, each just a little bigger than the size of a sheet of plywood.
Rotary-cut veneer has a broad cathedral-shaped grain pattern. Because there are large distances between the annual growth rings, it can be very difficult to match up the edges seamlessly, so the transition from one piece of rotary veneer to another is quite obvious. Because of that, this cut is reserved for economy grades of veneered plywood. It is also used in the core of most plywood sheets, where the joints aren’t visible.
The same plain-sawn grain pattern is achieved in a second veneer cutting method, which is called flat slicing. Here, the log is again cut from the trunk and after it is de-barked, it is sliced in two equal halves along the grain. The resulting half logs are then placed with the newly cut wide, flat face down, and a knife begins slicing across the top. The resulting slices are then restacked as they once lay in the log and this collectively is called a flitch. The width of each slice, or ‘leaf’, is restricted to the actual width of the log, but the edges usually have a tighter grain pattern that makes them easier to match and make up a wider panel.
A third method of cutting veneer is quarter slicing, where the log is sliced in four along the grain and then the wedges are sliced again to produce quarter-sawn patterns (and a flake pattern in some species such as white oak). Occasionally a cabinetmaker asks for a rift cut, which is essentially a quarter cut taken at 15 degrees to minimize the amount of flake and produce more comb (the very tight vertical grain closer to the outside of the log).
Rotary and quarter cuts are usually made on the trunk and slicing cuts are usually made on figured areas.
Veneer matching
When a large log is rotary cut, the resulting sheet is usually crosscut every 4 or 5 feet so it’s wide enough to cover a full sheet of substrate. But sliced veneers produce leaves that are only as wide as the trunk of the tree or the diameter of a burl, so several of these narrow pieces need to be used to make up a wide panel. The process of placing them together and forming aesthetically pleasing grain patterns is called matching.
The three main ways to match are book, slip and swing. In book matching, every other leaf in the flitch is flipped horizontally, so that they resemble the pages in a book. This is by far the most common method. Most cabinetmakers and furniture builders have done the same thing by edge-sawing a board and opening it up like a book and then edge-gluing the two halves to form a wider board. What is nice about this arrangement is that the grain patterns always match along the joints.
In a slip match, the leaves are simply slipped to one side and butted together. This delivers a dramatic effect where the joints are immediately visible. Some furniture builders like to slip to the left on left-hand doors and then flip the stack and slip to the right on right-hand doors. The end result is a pair of doors that match.
The third option can be a little complicated. Swing matching means that every second leaf is flipped end-for-end. However, a further dramatic effect is achieved when pairs of swing-matched leaves are then book matched (as was done in the example of swing matching shown here).
Matching the sliced leaves in these patterns provides a number of visual options for a cabinetmaker that are relatively easy to complete with veneer and rather difficult to do with solid wood. The number of leaves can also add variety. For example, there can be an odd or even number of leaves in a panel and this moves the visual center. If there are, for example, five leaves (a “balanced” match), then the middle of the panel is a complete leaf. If there are four or six leaves (a “center” match), then the middle of the panel lies on a joint. Sometimes the leaves don’t match up well with the substrate and a builder ends up with half a leaf on one panel and the other half on the next. In that case, the pattern is called a “running” match.
When a builder really wants to get creative, sketch matching is a good choice. This process uses squares and triangles of veneer to create patterns that meet in the middle. They can be checkered (like the pattern in parquet flooring) or take the shape of starbursts, diamonds and other geometric layouts such as the traditional herringbone.
A few notes
If you bring a log to a veneer mill to have it sawn or buy one from them, keep in mind that they need to slice thin so they get the most square feet from a log. But you can choose to make it a full 1/16” thick if you like, instead of the industry standards of 1/32” or 1/40”. That means less chance of accidentally sanding through it and, with crotch and other highly figured cuts that need to be flattened, there is less chance of it shattering, especially where end grain is dominant.
Sometimes the mill can clamp the entire flitch together and joint one or both edges. That means a lot less time playing with it later in the shop. If that isn’t an option, then clamp the flitch between two boards and run it across the jointer — but make sure the clamps won’t hit the knives or the fence!
The normal practice when creating panels that are wider than one piece of veneer is to stack two layers and use a veneer saw to cut the edges simultaneously so that they match perfectly. The wood is then taped together edge-to-edge before it is attached to a substrate.
Veneer tape without holes is used on thicker, difficult veneer, but most leaves can be joined using perforated tape. It shrinks a little as the glue dries, so it pulls the edges closer together. Tape is applied to the top (viewable) face of veneer, rather than the glue side (there are a few exceptions). The main advantage of the holes is that one can be a little more precise in placing, as the sawed edges are visible through the tape. And as veneer is so thin, there is rarely a good face, so it can usually be flipped.
This article originally appeared in the February 2015 issue.