Accuracy improves with consistency
Right is wrong. For more than 30 years, that little phrase has governed the crosscutting process in our shop. The laser guide on the miter saw is set up so…
Right is wrong.
For more than 30 years, that little phrase has governed the crosscutting process in our shop. The laser guide on the miter saw is set up so that the workpiece (the “keeper”) is to the left of the blade and the waste is to the right. That way, a tape measure that runs from the far left end of the part only has to register with the laser to be spot-on. The blade kerf (the material removed by the teeth) lies to the right of the laser line.
And, for more than 30 years, we have had employees and students who occasionally place the keeper to the right and cut a part that is too short by the thickness of the blade. Not everyone listens.
So, the first rule when it comes to making accurate cuts is consistency. If everyone does it the same way — and always does it the same way — the results will be reliable. To ensure that, our miter saw’s outfeed table (the one to the right of the blade) has a big old “X” drawn on it, followed by the word “waste.” The X is significant: whenever a student or employee marks a board, he/she is asked to draw a small X on the waste side of their pencil line. That way, they never cut on the wrong side of the line.
Such simple instructions must appear jaded and unnecessary to hardened old woodshop veterans. But for new people on the shop floor, they are the building blocks of a safe and successful career. I know, because I first heard them spoken by my own instructor, Greg Muellerleile, back in the early 1980s. Even though he passed on awhile back, I still do it his way. Greg was a grumpy old dude and I’m not giving him any excuses to come back.
Repeatability
If the shop is consistently making a lot of crosscuts, it might be time to invest in an automated stop system such as the SawGear from TigerStop. It essentially eliminates the tape measure: just dial in the required length and the stop automatically moves along the back fence to the right position.
Shops that don’t use the miter saw all day might want to consider a manual alternative such as the Precision Trak and Stop System from Kreg Tool. This is an aluminum extrusion that attaches to the miter saw’s shop-built extension table fences. It features a couple of different stops that slide in tracks. One locks in place, while the other flips up out of the way when it’s not being used. The advantage to having both is that the flip stop can be set for a measurement that is needed more than once. A woodworker can flip it out of the way to use the main stop for other cuts and then return to the flip measurement as needed. It’s really nice when cutting kitchen door stiles and rails when the stiles are all the same length and the rails vary.
If a shop prefers to build jigs in-house, we’ve been using the one shown on page 18 for a couple of decades. Use a T-slot bit to create a track that sits behind the miter saw’s extension fence. A cleat in the bottom of the sled slides in the track and a star knob and T-bolt lock the stop in position. Build a few stops and they can be set in place and left there for repeatability if the shop cuts a few different parts to standard lengths. There’s a locking nut on the flip stop and it’s just tight enough to let the arm move without flopping around.
Compound cuts
Making accurate cuts in crown molding can be tricky until you get the hang of it. That’s because many of the cuts require the saw to be set at one angle while the blade leans at another. There are all kinds of books and videos on the subject that include mind-boggling charts and mathematical formulas or complex ways to transfer measurements without accidentally reversing the angles and screwing up the cut.
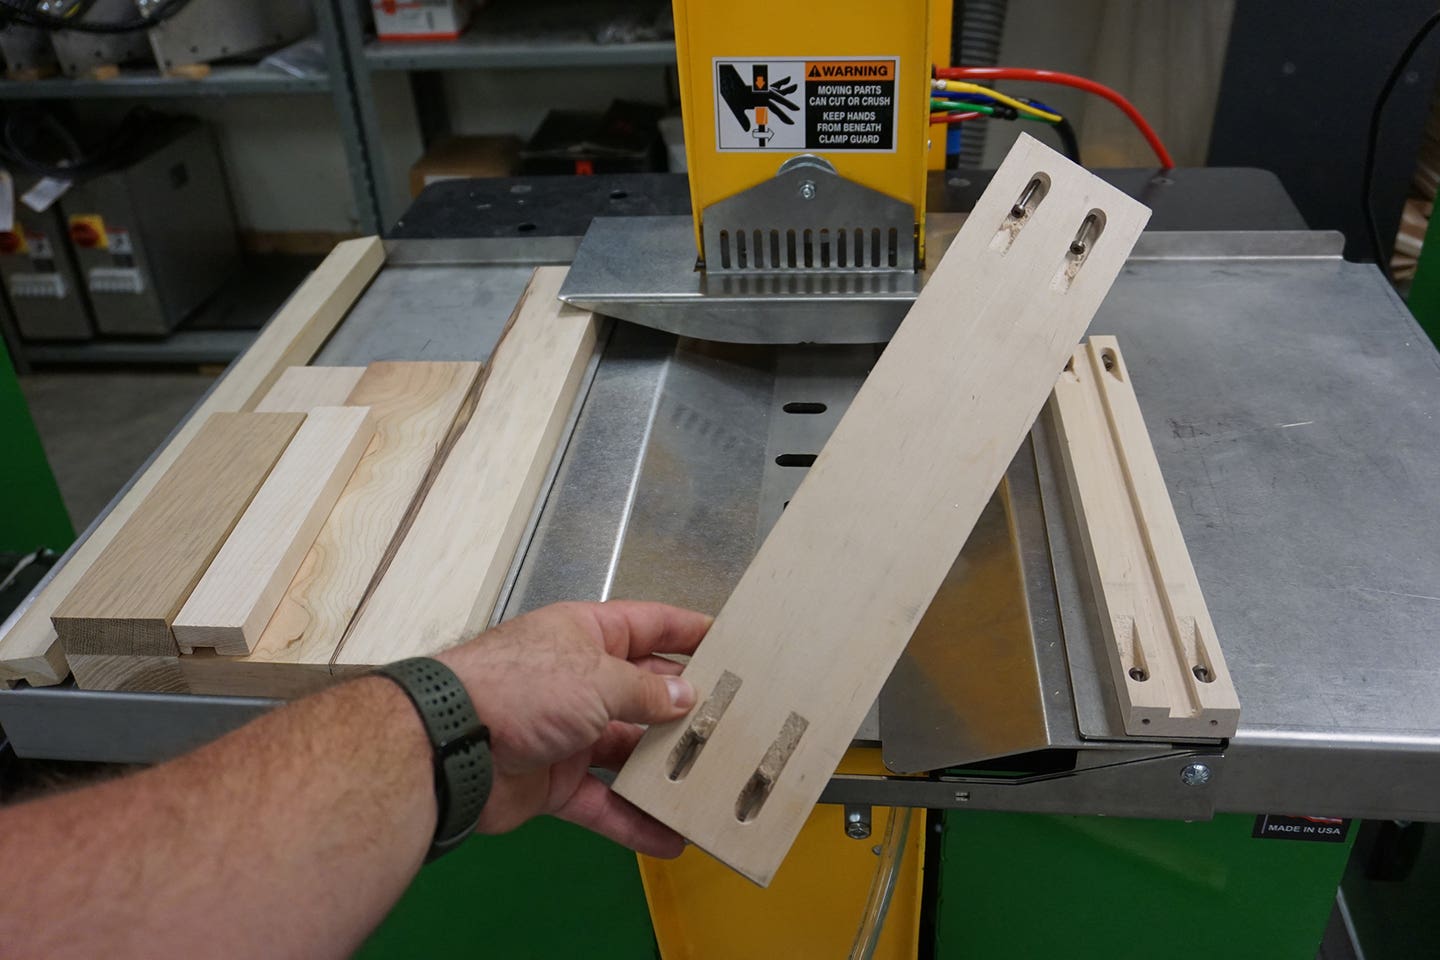
There is a much older and far easier way. Just build a quick jig.
By assembling a small channel (a bottom and two sides), an installer can place the molding in the saw in the exact same orientation that it will have when installed on the wall. That eliminates any confusion from reversing or compensating. Simply measure and cut. Chopping up the jig isn’t a problem if the miter saw cuts into the sides, but leaves most of the bottom intact. Besides, it only takes a few minutes to build a new one if it gets too chewed up.
It’s a good idea to assemble the channel with glue rather than screws in case somebody cuts in the wrong spot and destroys a few carbide saw teeth.
The idea here is to prop up the molding at exactly the same angle at which it will be installed. That way, the installer doesn’t have to try to visualize angles: what he’s looking at is exactly what goes on the wall. Simply measure and cut.
As with all long moldings, supporting the ends at the same height as the saw bed will deliver a more accurate cut. A couple of other basics to keep in mind are keeping the saw clear of debris so that compacted sawdust or small chips can’t alter the angles and have enough light so you can see whether the work is tight against the fence.
Adjustments
If the miter saw is used in the shop and also on the job site, it tends to get bumped a bit during travel. Even a saw sitting in one position all the time has to endure a lot of wood parts being slapped against the fence. So check the fence alignment about once a month. This is as simple as lining a straight-edge across the two halves of the factory fence and making sure there are no gaps. If there are, almost every fence has a couple of bolts that can be loosened up for adjustments.
When the saw is at rest, the blade should obviously be at a true 90 degrees vertically to the bed. Unfortunately, many models tend to creep to the side where the weight of the motor is over time or they succumb to the constant downward pressure on the handle. If your saw does, you might eventually be cutting everything at 89.5 degrees. If the lock isn’t adjustable or the detent “positive stop” at 90 degrees has worn a bit and become sloppy, there might be a way of shimming the saw so that it realigns properly. Check you owner’s manual and a local tool repair shop might also be able to help.
Blades
It’s hard to envision, but blades can sometimes warp, especially if they constantly work in dense, heat-generating material such as MDF or solid-surface materials. In our shop’s experience, this seems to be more common in thin-kerf than full thickness blades. Saw blades that have been resharpened improperly are also likely to generate a lot of heat because they are being asked to abrade rather than slice. And blades with chipped teeth or even teeth missing have to work harder and are often no longer properly balanced.
All of these can contribute to inaccurate cuts. If the blade is out of balance, the teeth “wobble” and cut a kerf that is wider than their designation. For example, a blade that should cut a 3/32” path might be chopping one as wide as 1/8”. Besides delivering a more ragged cut, the part is now 1/64” shorter than it should be.
Thin kerf blades work better when they have stabilizing plates. The incredibly thin Micro-Kerf blade from Total Saw Solutions comes with two stabilizers already attached. For most other brands, aftermarket versions are available. Some of them have a thinner, reduced center that allows them to be installed on the short threaded bolt of a miter saw. Be aware that these stabilizers can offset the blade a hair, so your laser guide might no longer be aligned and could require adjustment.
Old-fashioned advice
A woodworker for more than half a century, Ken Froelich runs a one-man shop where he does most of his joinery by hand. We asked him for some basic advice on crosscutting to length, especially for those of us who are training new talent.
“It’s a good idea to cut the longest pieces first,” Froelich says. “Then you can use the cutoffs to make smaller parts. If you start by making small parts, you’ll probably end up having to make some scarf joints later to hide your mistake, especially with installs like crown molding.
“Another thing I’ve often seen young guys do a lot is gathering creep. If you cut one part and then use it as a template to mark the next part and use the second one to mark the third, then pretty soon things start to get longer. Always use the first one — and only the first one — to mark all of the rest.”
John English has been a cabinetmaker for three decades. He taught joinery and turning at the Black Hills School of Woodworking and his newest book, “Harvesting Your Own Lumber,” will be released this summer by Linden Publishing.
This article originally appeared in the May 2014 issue.