Dont fear the dead zone
Inside corners are the bane of kitchen designers everywhere. What’s the best way to handle this awkward zone? Should one always try to use every cubic inch of available space?…
Inside corners are the bane of kitchen designers everywhere. What’s the best way to handle this awkward zone? Should one always try to use every cubic inch of available space? Or is there an easier solution?
I built a kitchen this spring for a new apartment in an old commercial building and it needed to fit in an area that was created by combining a closet with a small, unused former bathroom. The client wanted painted pine cabinets and, as the customer is always right, that’s what we did. She also made it very clear that she absolutely abhorred Lazy Susans. Being in her 50s, she was no longer interested in getting down on her knees to see what was on the bottom shelf.
The solution she arrived at was, for me, a little painful. It left a lot of dead space on either side and behind the base cabinet and, while building it, I was having some serious doubts. But once installed, I saw immediately that she was right. The countertop (granite tile with ceramic bullnose and backsplash) cuts into the room a little more than I’m used to, but the net result is a very usable, standard-depth cabinet with an opening that’s more than 20” wide. It has a custom toe-kick to accommodate the appliances on either side: the ends are mitered. And above, the countertop’s inside corner is a perfect spot for an appliance garage or, in this case, a microwave.
The biggest problem I had with this design was not working out the geometry, but getting my head around the fact that we were voluntarily abandoning valuable space. The whole idea behind custom kitchens is that they are efficient. Did we sacrifice that sacrosanct efficiency for mere ergonomics here? Did we break the rules just because it would be easier for my client to see inside?
You bet we did.
The solution
This was — wait for it — thinking outside the box. And it took somebody outside the trade to go there. She didn’t want a Lazy Susan, which actually wastes a lot of space anyway because it’s a circle inside a square and the corners are forfeited. She didn’t want a trapezoid with a narrow front and a wide back, because it’s difficult to reach into those distant corners. She didn’t want an L-shaped front with a hinged door, because the door gets in the way and the opening is just too small. One after another, she gave me sound reasons not to use each of the standard solutions.
She also gave me a couple of problems to solve.
First off, this cabinet would not butt against the wall, but it still needed to be placed so that it fit perfectly against its neighbors (in this case a dishwasher and stove). Next, as it didn’t occupy much space, how would it support the countertop, which in this case needed to be quite rigid because it was going to be tiled?
The easiest way to deal with placement is to set all of the other cabinets and appliances first and then just measure and build. As this is not very practical on most jobs, I did the next best thing. I mitered the front corners of the box and gave each of them a 3” return, so their neighbors would have something traditional to butt up against. Continuing that 3” line all the way to the wall (on paper) made it quite easy to create a layout. And by only going 3”, I didn’t compromise my client’s wishes by creating hard-to-reach corners inside the cabinet.
If the neighbors are both base cabinets, the 3” mitered corner allows one to screw it to their face frames or carcass. If, as in this case, the neighbors are appliances, then a little carpentry is called for. I simply mitered the ends of a couple of 2x4s and screwed them to the cabinet from the inside, flush with the top. Then I secured them to 2x4s screwed to the wall, which also solved my other problem. Those wall cleats perfectly support the plywood under the cement board that carries the granite tile.
Other options
If you don’t like the idea of giving up those three triangles of empty space that a square cabinet in an inside corner creates, there are lots of other choices available. I spoke with Jessi Connolly, the e-commerce manager at Kitchensource.com in Stratford, Conn., who recommended the following solutions.
Omega National makes a KitchenMate blind-corner cabinet organizer (model NA-P0650MNL1) that comes with a reversible piano hinge. That means it works in left- or right-hand applications. The hardware is heavy duty and the slides are premounted, making installation a whole lot easier. There are two shelf rollout kits included and the caddies have a 15-mm prefinished maple storage bin designed for bulk storage. This organizer is designed for 15” or larger openings and it’s small enough to ship via UPS or FedEx. Retail is about $320.
Hafële’s Magic Corner II (model HA-548.10.240) comes in left or right configurations. Designed for use with hinged doors (although it attaches to the cabinet and not the doors), it requires a minimum opening of 494 mm (19-1/2”) and additional clearance for the door hinge. The front baskets swivel out of the way and, at the same time, the back baskets move into the cabinet opening. The back baskets also slide forward individually, which provides full access to everything that used to be stored way back in the corner. Hafële’s Soft and Silent feature slows the action just before final closure, creating automatic and silent closing. The baskets shown in the photo are sold separately, as are other shelf and basket options. The Magic Corner II runs about $744 to $781 retail, depending on options.
Rev-A-Shelf has an interesting take on the Lazy Susan. Its Half-Moon Pivot and Slide (model RAS-4WLS882-38-570) is made of maple and can be adapted to left or right corners. The same unit can be used in a full-height cabinet or one with a drawer and, because the pivot is offset to one side of the moon-shaped shelves (as opposed to being centered on a traditional half-round shelf), it reaches out farther into the room. That saves backs and bending, which is the biggest complaint about standard Lazy Susans. It retails for about $300.
Rev-A-Shelf also makes a blind-corner cabinet organizer called the Optimizer (model RAS-5PSP-15-CR) that has two large and two small baskets, all of which are vertically adjustable. The unit is easy to assemble and it attaches to the cabinet floor. It has full extension ball-bearing slides and what’s really nice here is that the second unit fully clears the cabinet, making for great access. Retail is in the region of $350.
Knape & Vogt offers a very sturdy and innovative slideout (model KV-BBCS-L-15-FN) that has frosted nickel baskets with Baltic birch bottoms that keep pots and pans or whatever you need securely in place. A quick initial pull on the handle lets the unit glide out of the cabinet on quiet, ball-bearing slides. One more pull exposes the entire unit. When you’re done, simply slide the corner unit back into its hiding place. Like the Rev-A-Shelf Optimizer, the second unit here also clears the cabinet. Retail is about $730.
If none of the above solutions quite hit the spot, there is always the corner drawer. Based on an original concept that was designed for Blum, it is now offered in three configurations by Max Hunter’s Western Dovetail (www.drawer.com). The first dovetailed corner drawer was developed to launch Blum’s Space Corner concept in 2005. Since then, Western Dovetail has been leading the industry with angled dovetails, curved front drawers and just about anything their customers can dream up. It now stocks standard corner drawer boxes for immediate shipment (supply your own slides and fronts), all of which have dovetailed corners. The Blum drawer is compartmentalized, a second-generation version called the Chevron has no interior dividers and now they offer wide-angle corner drawers and even boxes where one side is a different dimension than the other. That means that one wall of cabinets might have, say, 12” of space left when it comes to the corner, while the other has maybe 15”, and you can still order a stack of drawers to fit.
Corner drawers leave a little void on either side of the drawer, much as my own custom cabinet does, and it takes a little willpower to allow that to happen. Of course, one could change the shapes of the adjacent cabinets, making them wider at the backs than the fronts, but now you’re building three custom boxes instead of one. If budget isn’t an obstacle, then maybe that’s the way to go.
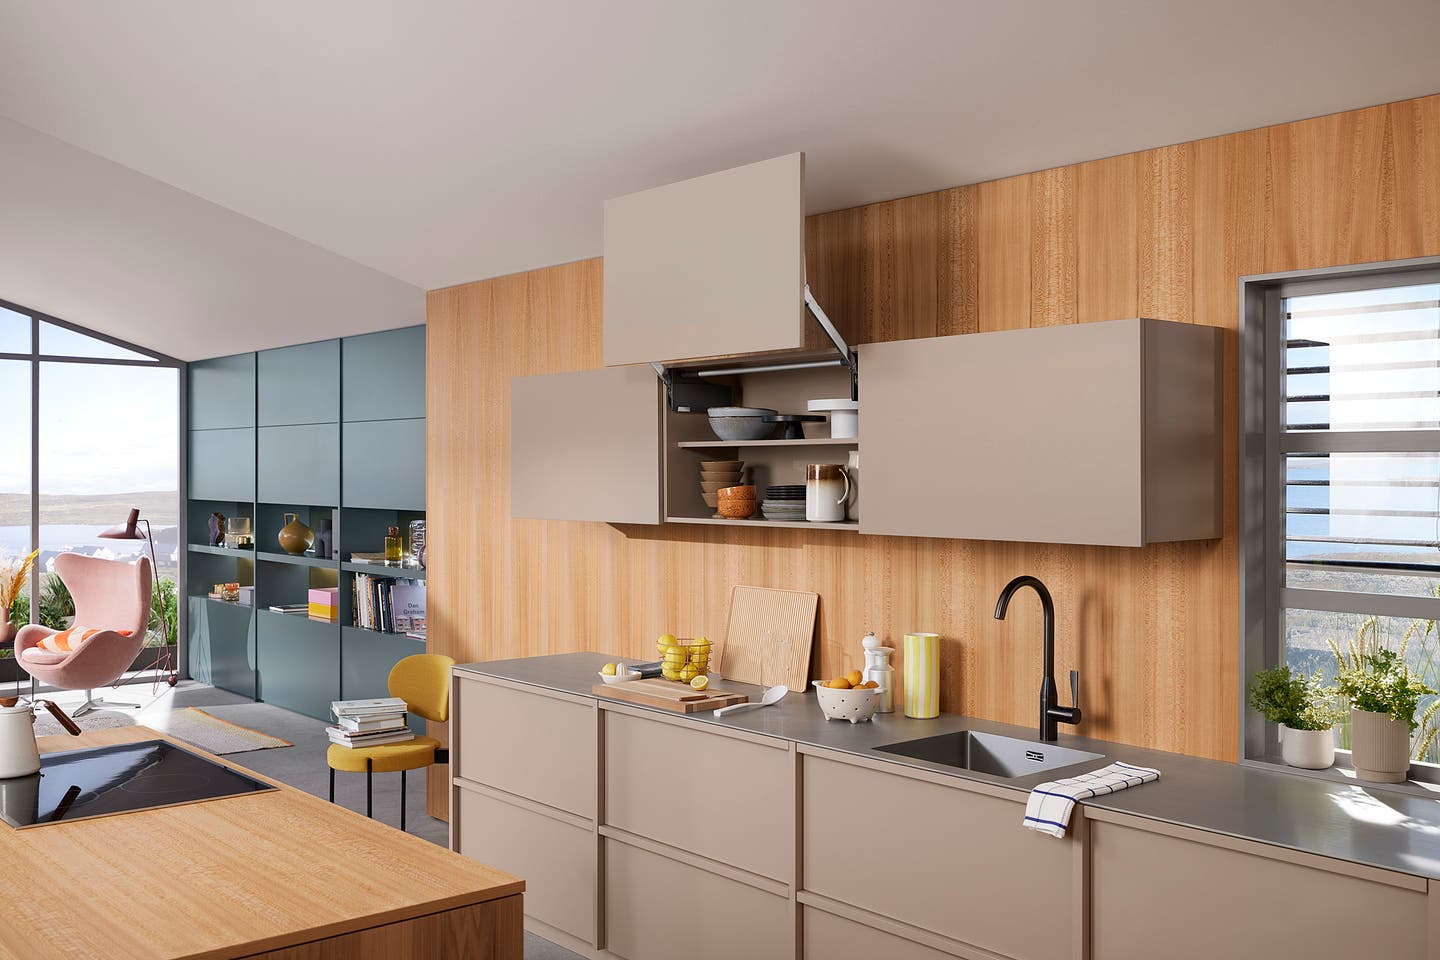
There is one nice thing about inside corners. Even though the base cabinets are a pain, the wall cabinets are easy to manage, because their shallow 12” depth doesn’t create any hard-to-reach corners.
This article originally appeared in the May 2013 issue.