The versatility of veneer
Whether repairing antiques, building one-of-a-kind furniture or laminating curves on cabinets, most woodworkers eventually discover veneer. One’s first instinct is to think of it as simply a way to get…
Whether repairing antiques, building one-of-a-kind furniture or laminating curves on cabinets, most woodworkers eventually discover veneer. One’s first instinct is to think of it as simply a way to get the most out of rare cuts or species. But veneer serves many functions beyond thrift. It makes life easier when dealing with curves, gives a woodworker access to some very dramatic grains and colors and can be applied to a stable substrate to create wide panels or complex patterns.
Veneer cuts
There are essentially three ways that mills create veneer. A log can be flat-sliced, quarter-sliced or rotary-sliced. A fourth technique, rift slicing, is generally reserved for a few specific species, most notably white oak.
Flat slicing is similar to the way that logs are traditionally plainsawn into boards. The log is ripped down the middle and one half is milled at a time. The flat face of the half being milled rides against a fence while the blade cuts slices off parallel to the fence.
Quarter slicing begins with splitting the log into four quarters and the machine slices these at 45 degrees. This is the preferred method with species that have dominant medullary rays (like the ribbons in quartersawn oak). The strips are narrower than plain-sliced veneer, but show a lot more character. This method can be a little wasteful, as it’s difficult to use some of the smaller cuts.
Rotary slicing is done by mounting the log on a lathe and rotating it into a knife. This produces very wide sheets of veneer, suitable as skins for substrates such as plywood.
Veneer taping
When panels are required, narrow strips of plain- or quarter-sliced veneer can be edge-matched to create wider sheets for mounting to substrates. Tape can also be used to create geometric patterns or segmented circles that look like an orange that has been sliced across the middle. It holds banding (very thin strips of contrasting or patterned veneer) in place, too.
In the woodshop (as opposed to mass production in the veneer mill), the normal practice when creating panels that are wider than one piece of veneer is to stack two layers and use a veneer saw to cut the edges simultaneously, so that they match perfectly. The wood is then taped together, edge-to-edge, before it is attached to a substrate.
Veneer tape comes in various sizes, with or without holes (perforations). The tape without holes is used on thicker veneers that are not behaving well (such as crotches or highly figured cuts), but most veneers can be joined using perforated tape. It shrinks a little as the glue dries, so it pulls the edges closer together. Tape is almost always applied to the top face of veneer, rather than the glue side (there are a few exceptions). The main advantage of the holes is that one can be a little more precise in placing because the sawed edges are visible through the tape.
As veneer is so thin, there is rarely a good side (one that is better than the other) and this helps when matching because orientation can be a little more flexible. The veneer can be flipped. Every now and then, a piece of stock that is highly figured (usually from a burl) can have one face that is a little cleaner than the other, but that’s rare.
Luthiers and other craftsmen who work with veneer a lot tend to use chalk to mark the back of each slice of veneer and, if there is no tape involved, that’s a good idea. The presence of tape indicates that the good face is showing. Chalk can also be used to mark matching edges. When a bundle of veneer slices (a flitch) is being used, it’s easy to lose track of which piece belongs where because the grain and color patterns are very similar.
Initially, short lengths of tape are applied across, rather than along, a joint. This leaves more of the joint visible for inspection. Activate the tape by dampening its shiny face with water (a squeezed-out sponge works well), like one does to a postage stamp. Getting it too wet can actually leave marks on the veneer and these can be difficult to remove, so moderation is key. A J-roller that will be used later on to press the veneer onto a glued substrate can also be used here to ensure that the tape adheres properly to the veneer.
Every now and then it’s necessary to lay tape all along an edge that simply won’t lie flat. That technique is also used when all of the short pieces are in place across the joint. The final piece runs along the joint and a rag or paper towel is pressed along the joints to help absorb some of the water.
As the tape dries, it’s a good idea to place a flat board with some weight on it over the joints to prevent crinkling. And wavy veneers need to be soaked and flattened as they dry before being taped or glued to a substrate.
Glue choices
The glue for veneer has traditionally been hide (which required hammering the veneer to press the wood down to the substrate), but nowadays we have lots of other choices. For example, Titebond’s Cold Press glue is specifically formulated for laminating wood to solid woods, particleboard, MDF, plywood and other porous materials. Better Bond Veneer Glue comes in various colors and there’s also a Heat-Lock version for iron-on veneering of irregularly shaped projects.
Other cold press glues come either premixed or as powders that require water to work. The powder version is said to be more resistant to heat and water when dried.
These veneer-specific glues are more viscous, so they offer more control, more void-filling ability and less bleed-through. They are often colored to match the wood species, which helps to disguise glue lines. And unlike standard yellow (aliphatic resin) glues, they allow less cold creep once cured.
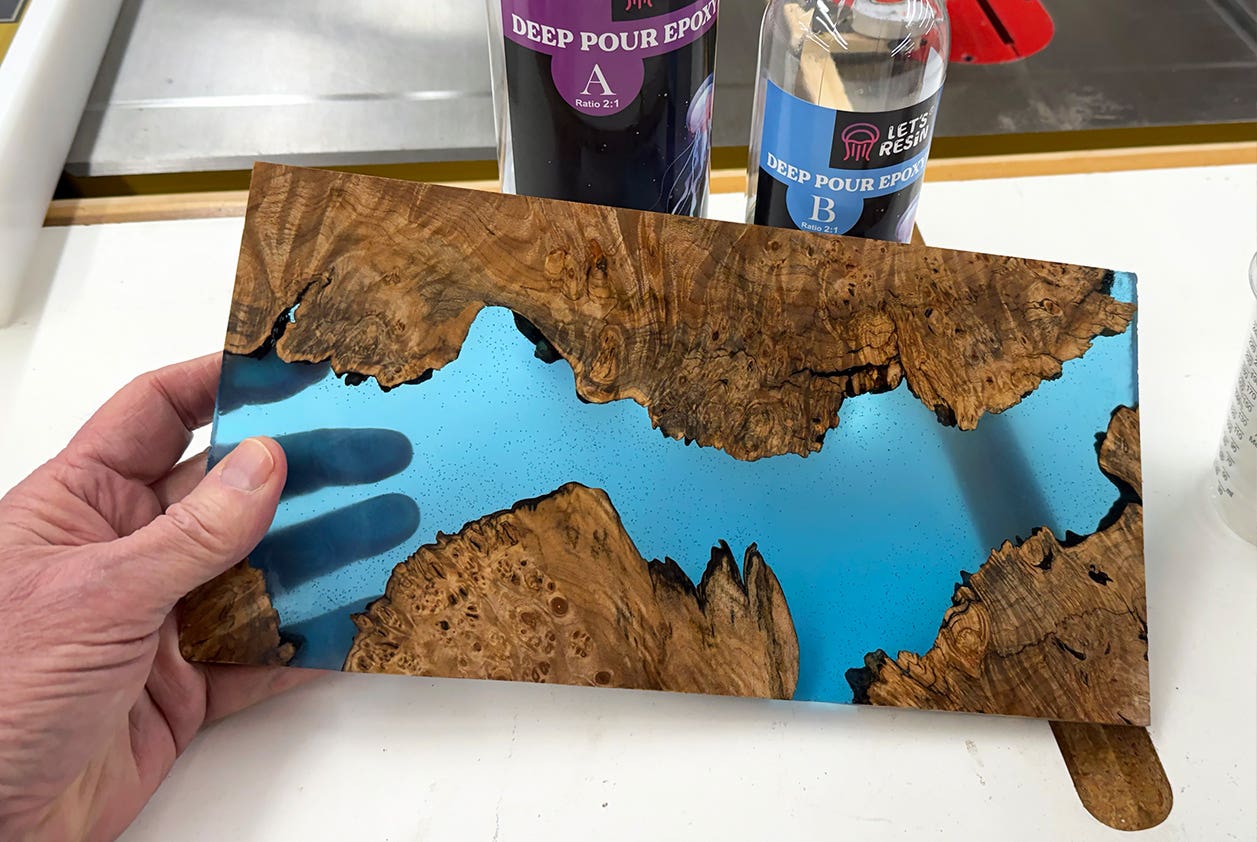
For small areas of repair, it’s possible to use epoxy, but if the furniture is a valuable antique, check with a dealer first as there is no going back with epoxy as there is with hide glue.
Personally, I don’t like using polyurethane-based glue for veneering because of its foaming and also the lack of “spreadability.” And I also shy away from contact cement because of its unforgiving nature.
Glue is usually applied to both the veneer and the substrate. Choose a finish that won’t react with the glue (rare, but it can happen).
Substrates
This is the base to which the veneer is being glued. And the more stable it is, the better. Relatively immobile sheet goods such as MDF and micro-ply (Baltic birch) are excellent substrates. Through the decades, furniture builders used myriad common species as backers for expensive veneers, including everything from pine to gumwood, maple and poplar. The problem with using solid wood is that it moves — and not just across its grain. It also warps, twists and bows and, if the glue and veneer don’t follow suit, delamination and splitting can occur. If you must use solid wood, orient the wood and veneer grains in the same direction. On plywood, go across the top layer.
For my money, the best substrate is MDF. It’s strong, flat, absorbs glue well, doesn’t shrink or expand, is fairly inexpensive and is void-free. It’s not the greatest material in damp environments, but then who wants to leave any veneered project in such a place?
Always balance the substrate. That is, apply an equal amount of veneer (it can be of lesser quality) to the bottom of the substrate, especially on plywood and solid wood cores, or the substrate might warp.
Veneer presses
There are several ways to apply even pressure over veneer when it is being glued to a substrate. The traditional method for flat panels is a press with several clamps (called screws) that distribute the pressure from the center toward the edges. The panel is a multilayered sandwich consisting of plywood, paper, the backer veneer, glue, substrate, glue, face veneer, paper and another piece of plywood on the top. Sometimes, cauls are used to help distribute the pressure. These have a very slightly bowed bottom, so that when the ends are clamped, the center makes good contact.
Most small projects nowadays are veneered with vacuum presses, which is a whole other discussion. Before investing in one, it’s advisable to go online and look at the options.
When your panel or project comes out of the press, the tape must be removed. It can usually be lightly moistened with a paper towel and then peeled off. If there is any residue from the tape adhesive, a light rubdown with denatured alcohol should take care of it. Scraping with a card scraper also works well because the scraper offers a lot more control than an electric sander. Taped areas can be sanded using a hand block for curved surfaces and if a power sander is used it should have random orbital action, especially for projects where various grain directions meet.
This article originally appeared in the February 2013 issue.
A.J. Hamler is the former editor of Woodshop News and Woodcraft Magazine. He's currently a freelance woodworking writer/editor, which is another way of stating self-employed. When he's not writing or in the shop, he enjoys science fiction, gourmet cooking and Civil War reenacting, but not at the same time.