Spot and fix the most vexing problems
Here are 15 of the most common application problems, gathered together in one list. I first describe each problem and then list methods to avoid and fix it – if…
Here are 15 of the most common application problems, gathered together in one list. I first describe each problem and then list methods to avoid and fix it - if it's possible to fix.
{loadposition position10}
Blushing: A milky whiteness that appears in a sprayed lacquer-type finish on a humid day within seconds after application.
- To avoid, add lacquer retarder.
- To avoid, warm the lacquer.
- To fix, mist on lacquer retarder.
- To fix, rub with fine steel wool.
- The blushing often disappears on its own by the next day if you can wait.
Dry spray: A sandy-looking and feeling surface caused by spraying a lacquer-type finish that is drying too fast. It's very common when spraying the insides of cabinets and drawers.
- To avoid, add lacquer retarder.
- To fix, sand level and apply another coat.
Cotton blush: White clumps appearing in a lacquer-type finish when it dries caused by using a lacquer thinner that is meant just for cleanup.
- To avoid, use a lacquer thinner meant for thinning lacquer, not for cleanup.
- To fix, sand out and apply another coat using the proper lacquer thinner.
Finish won't dry or harden: The finish is still tacky or gums up sandpaper after a reasonable drying time for that finish.
- To avoid, work in a warmer room.
- To avoid with a lacquer-type finish, add some acetone or a faster lacquer thinner.
- To avoid on naturally oily woods, wipe over with naphtha just before applying the finish or apply a shellac sealer coat.
- To avoid with shellac, use more recently dissolved shellac.
- To fix, raise the heat or strip and start over.
Runs and sags on non-horizontal surfaces:
- To avoid, watch what's happening in a reflected light during application and brush out the sagging as it occurs.
- To avoid if spraying, apply coats thinner on the wood.
- To avoid if brushing, stretch coats out thinner.
- Least likely to occur with lacquer-type finishes.
- To fix, sand level and apply another coat
Orange peel: A sprayed surface that resembles the ripples on the surface of an orange.
- To avoid, thin the finish more or increase the air pressure.
- To avoid, watch what's happening in a reflected light and adjust your speed and distance to get an evenly wet application just short of runs and sags.
- To fix, sand level and apply another coat.
Fish eye: The finish bunches up into craters or ridges. This is most common when refinishing.
- To avoid, wash the wood thoroughly with solvent or ammonia.
- To avoid, seal the wood with shellac.
- To avoid, add fish-eye eliminator to the finish.
- To fix, sand out and add fish-eye eliminator to the next and all following coats, or strip and start over.
Pinholes: Small bubbles or pinpricks that develop in the finish as it dries. They appear right over the pores on porous woods such as oak and mahogany and are caused by air coming out of the pores.
- To avoid, dust on several coats followed by increasingly wetter coats with plenty of drying time between each.
- To avoid, fill the pores of the wood and avoid real wet coats at the beginning.
- To avoid, try slowing the drying of the sealer coat with retarder (though I don't find this very effective).
- To fix, dust on several coats followed by increasingly wetter coats.
Uneven sheen: Occurring from one coat to the next or on different objects when using a flatted finish.
- To avoid, stir the finish well before each use.
- To fix, apply another coat. Stir well first.
Wrinkling in a catalyzed finish: The wrinkling usually occurs in the second coat after the first has been applied over a sanding sealer or another finish.
- To avoid, follow the manufacturer's instructions exactly. This may call for using a vinyl sealer or the finish itself as the first coat.
- To fix, strip and start over.
Cracking in conversion varnish: This may not show up for months.
- To avoid, apply no more finish than will dry to a thickness of five mils (usually no more than three coats; two if you apply the coats thickly).
- To fix, strip and start over.
Glue splotching: Usually shows up as lighter areas around joints or from fingerprints, especially under a stain.
- To avoid, put less glue in the joints.
- To avoid, thoroughly wash off all the glue seepage.
- To avoid, pay more attention to sanding out all the glue seepage after it has dried.
- To fix after stain application, sand out with sandpaper wet with more stain.
- To fix after a coat of finish has been applied, disguise using markers or an artist's brush with colorants and apply another coat.
- To fix, strip and sand to an even color and restain.
Blotching from stain application: Occurs when some of the stain dries before it is wiped off and shows up as more opaque (most common with lacquer and water-based stains).
- To avoid, use a slower drying stain, or work faster or on smaller areas at a time.
- To avoid, have a second person wipe off quickly after you apply.
- To fix, strip and start over. You may be able to use the thinner for the stain if you catch the problem quickly.
Finish on cabinet doors, installed under sinks, peels from the bottom:
- To avoid, pay special attention to applying enough finish on the edges of cabinet doors. A pass at 45 degrees isn't enough. Spray each coat at 90 degrees all around the edge and then at 45 degrees followed by spraying the surface.
- To fix, strip and refinish, paying more attention to getting enough finish on the edges.
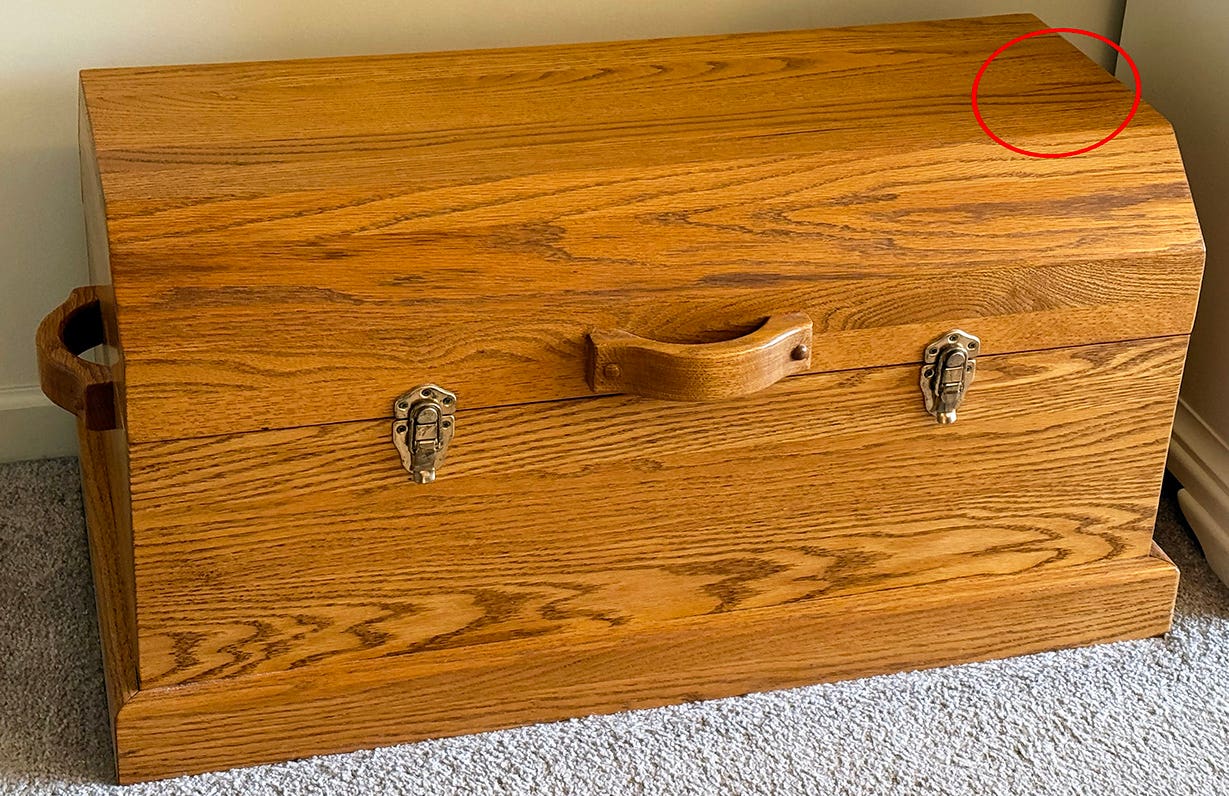
Finish peels away from 90-degree edges:
- To avoid, soften all sharp edges with several passes of sandpaper before applying stain or finish.
- To fix, strip and refinish, being sure to soften the edges first.
This article originally appeared in the September 2010 issue.