Avoid a blotch on your finishing record
In a recent short class on finishing for a woodworker’s club, I was asked at least five times whether it is possible to prevent stain blotching. Unfortunately, in the time…
In a recent short class on finishing for a woodworker's club, I was asked at least five times whether it is possible to prevent stain blotching. Unfortunately, in the time allotted, we couldn't create all the scenarios that can cause blotching, but in this article I'd like to explore most of them.
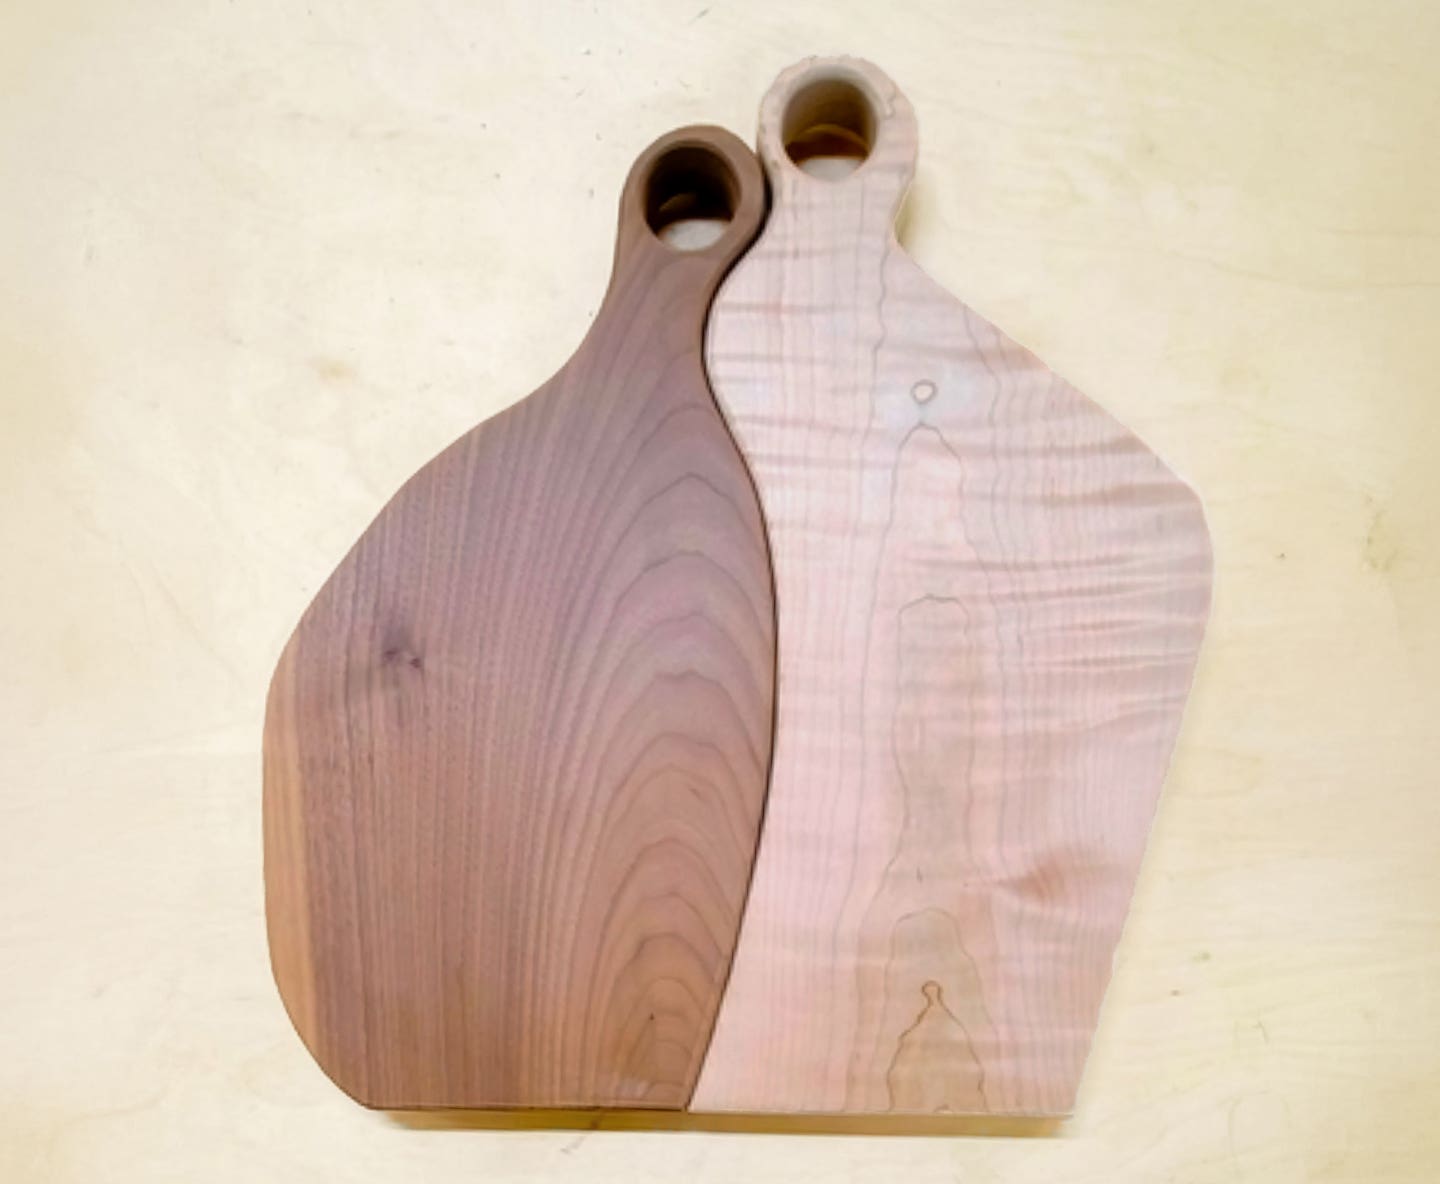
Let's define blotching as an undesirable inconsistency in the way the wood takes or accepts the stain. It could be as simple as more absorbent sapwood allowing a greater amount of a dye stain to penetrate, causing that portion of the wood to be more strongly colored than the adjacent, less absorbent heartwood.
It could be that the sanding is inconsistent, allowing a pigmented stain to take more where the wood is rougher, holding more of the pigment on the surface. It could also be the end grain exposed at the surface of the wood (sometimes called wild or contrary grain), especially with a veneer, providing miniscule voids at the surface where the pigments (colored particles in the stain) can lodge. The end grain can be compared to a stack of soda straws, ready to suck in a stain much more than the other edges or top of an item. The rougher it is, the more readily it absorbs or physically holds the stain.
The application of the stain itself can cause blotching. The finisher might brush or rag on stain in such a way that more stain is left in one area than another. Fast-drying stains are particularly prone to this type of blotching. Overlap lines can be left when the stain is applied unevenly, a stain rag can be left sitting on the piece while the finisher answers his cell phone, a sprayed-on dye can be allowed to puddle in a corner, or the stain can be wiped off carelessly and the blotching might not be noticed until the stain has dried.
Prevention
If blotching is a consistent problem, you'll need to examine your products and processes to determine what is going wrong and take steps to correct them. If it is not a problem, here are some ways to make sure it doesn't become one:
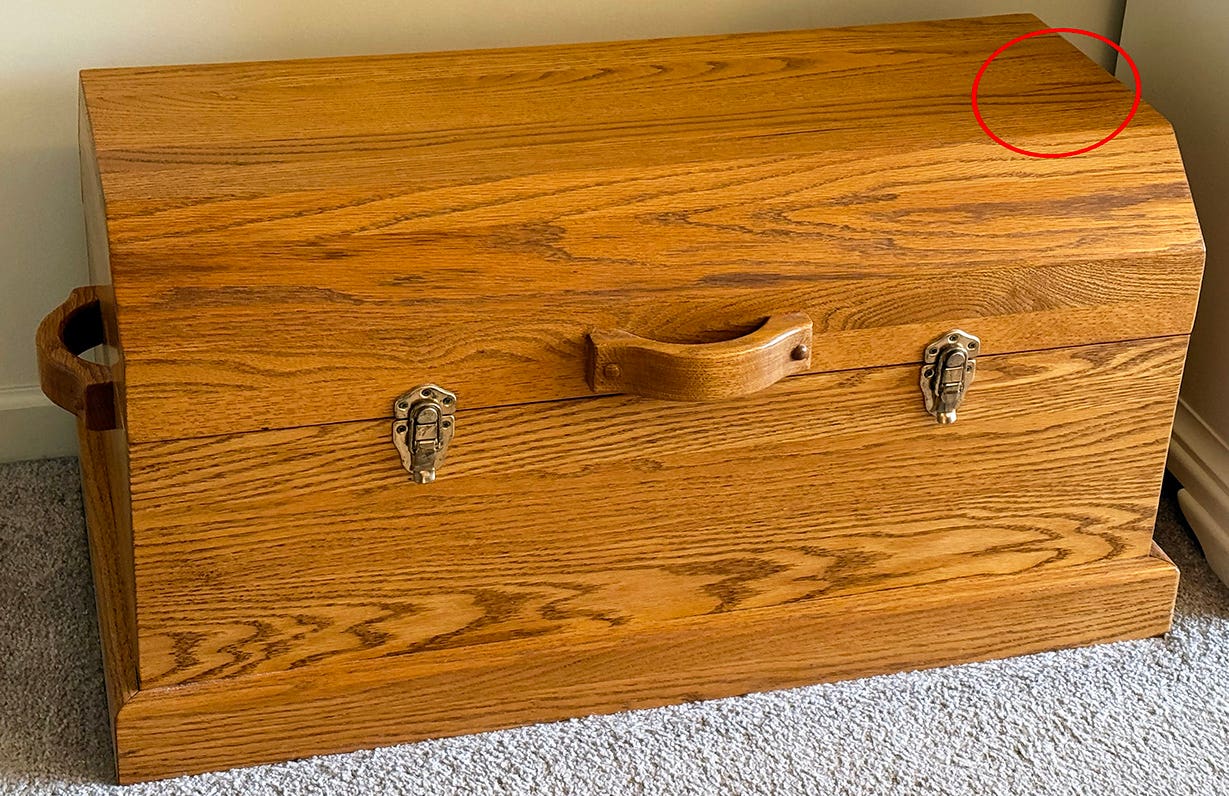
- Wood selection: Some woods are particularly prone to blotching. Birch, cherry, pine, poplar and some cuts of maple are examples.
- Wood preparation: Your sanding schedule should be consistent and the sandpaper should be kept clean and should be changed when it is no longer cutting well. Sand with a paper fine enough that the scratches don't show up when you apply stain and, for best results, sand the final grit in the direction of the grain. The final grit will depend on the type of wood, but will typically be between 150 and 320. Inspect the sanded wood by viewing the surface against a low-level light and feel the surface with your hand to make sure you haven't left any rough spots.
- Apply the stain within a short time after sanding, especially in conditions of high or changing humidity. Wood moves and a perfectly sanded surface in high humidity can stain differently in a few hours.
- With fast-drying stains, make sure that your application method and tools will allow you to cover each surface fast enough that it is all wet at once. With wiping stains, be sure to remove the excess before they dry. You may need two people for larger areas or simply work a small area at a time. Consider adding slower solvents (retarder) to the stains to gain more open time.
- With blotch-prone woods, learn to identify specific areas that are likely to absorb or hold more stain. End grain, whether on the end of panels or frame members, might need to be pretreated.
Pretreating
There are two basic types of treatment using products you can make or buy off the shelf.
For even penetration of dye stains, you can partially seal the surface, making it less absorbent. In a lacquer system, a thin coat of sealer, often called a washcoat, can be applied, allowed to dry and then sanded lightly, leaving the sealer in the voids. The dye can then be sprayed over the washcoat. If the dye stain contains acetone or lacquer thinner, you can't wipe the stain or remove the excess without making a mess as the solvents will dissolve the sealer. Topcoat material can also be used as a sealer, but will not sand as easily.
If wiping a stain is necessary, seal with a thinned coat of shellac or glue size. A 1-lb. cut of shellac is generally sufficient. Glue size is available commercially or can be made by reducing hide glue to a very thin, brushable viscosity. White or yellow wood glues can also be used, but don't sand as easily as hide glue size or the commercial version. A washcoat or size coat will limit the dye's penetration, requiring a stronger mix of dye or a second application to achieve the desired color.
Using this same procedure to seal under a pigmented stain makes the wood smoother, resulting in smaller and fewer voids and a less, but more consistent, color. However, fixing the color with a second coat of pigmented stain is not recommended, but adding color with glaze or shading lacquer is often done.
An alternative to sealing is the use of a pre-stain, conditioner or stain-controller product. These will generally be comprised of a solvent and binder, but no color. They are also sold as stain base, blender or neutral stain, and can be mixed with oil or universal colors to make a pigmented stain.
Erasing the blotch
Manufacturers of furniture and cabinetry look for easy ways to ensure consistency in color and pattern, and often use multiple applications of color, in different products, to achieve the desired result. This not only produces deep, rich and complex finishes, it gives the finishers the opportunity to adjust color gradually with each step. The use of sequential applications of dye stain, pigmented stain, glaze and shading lacquer or toner can often hide or minimize blotching that is not caught at the first opportunity.
If you catch the blotching while applying a pigmented stain, you can often remove much of the color with the solvent for that stain, especially if it is still wet. This stain is mostly on the surface and much can be removed. Sanding can remove more of the stain, but at the risk of having that area vary in appearance from the rest of the piece. Bleaching will lighten the color of a dyed wood, but respiratory protection is recommended.
Several applications of a reduced dye (more solvent, less color) is probably the safest approach to eliminating blotch.
Spraying to color
Manufacturers of lower-end cabinetry will often mix a dye or pigment with a small percentage of sealer and "spray to color," applying light coats of the mixture until the desired color is reached. This can also be called shading or toning. The downside is that the dye doesn't penetrate the wood, so there is no enhancement of grain, figure or depth. In fact, this technique tends to obscure those characteristics.
Occasionally a finisher will "dry spray" a reduced dye to achieve the same purpose. This also reduces penetration, gives a more even coating, but again the wood is somewhat obscured. There are spray stains intended for the same purpose, often called no-wipe stains.
Greg Williams, formerly senior touch-up and finishing instructor for Mohawk Finishing Products, is now a freelance instructor and consultant for finishing and touch-up. He can be reached at gregalwil@yahoo.com.
This article originally appeared in the April 2011 issue.